|
|
|
|
Machine Setup
The following Setup instructions assume that machine has been properly unpacked and all packing materials must be removed before beginning Machine Setup. As preparation for Setup and other sections, we suggest viewing Naming section.
Setting up the machine consists of the following steps:
|
|
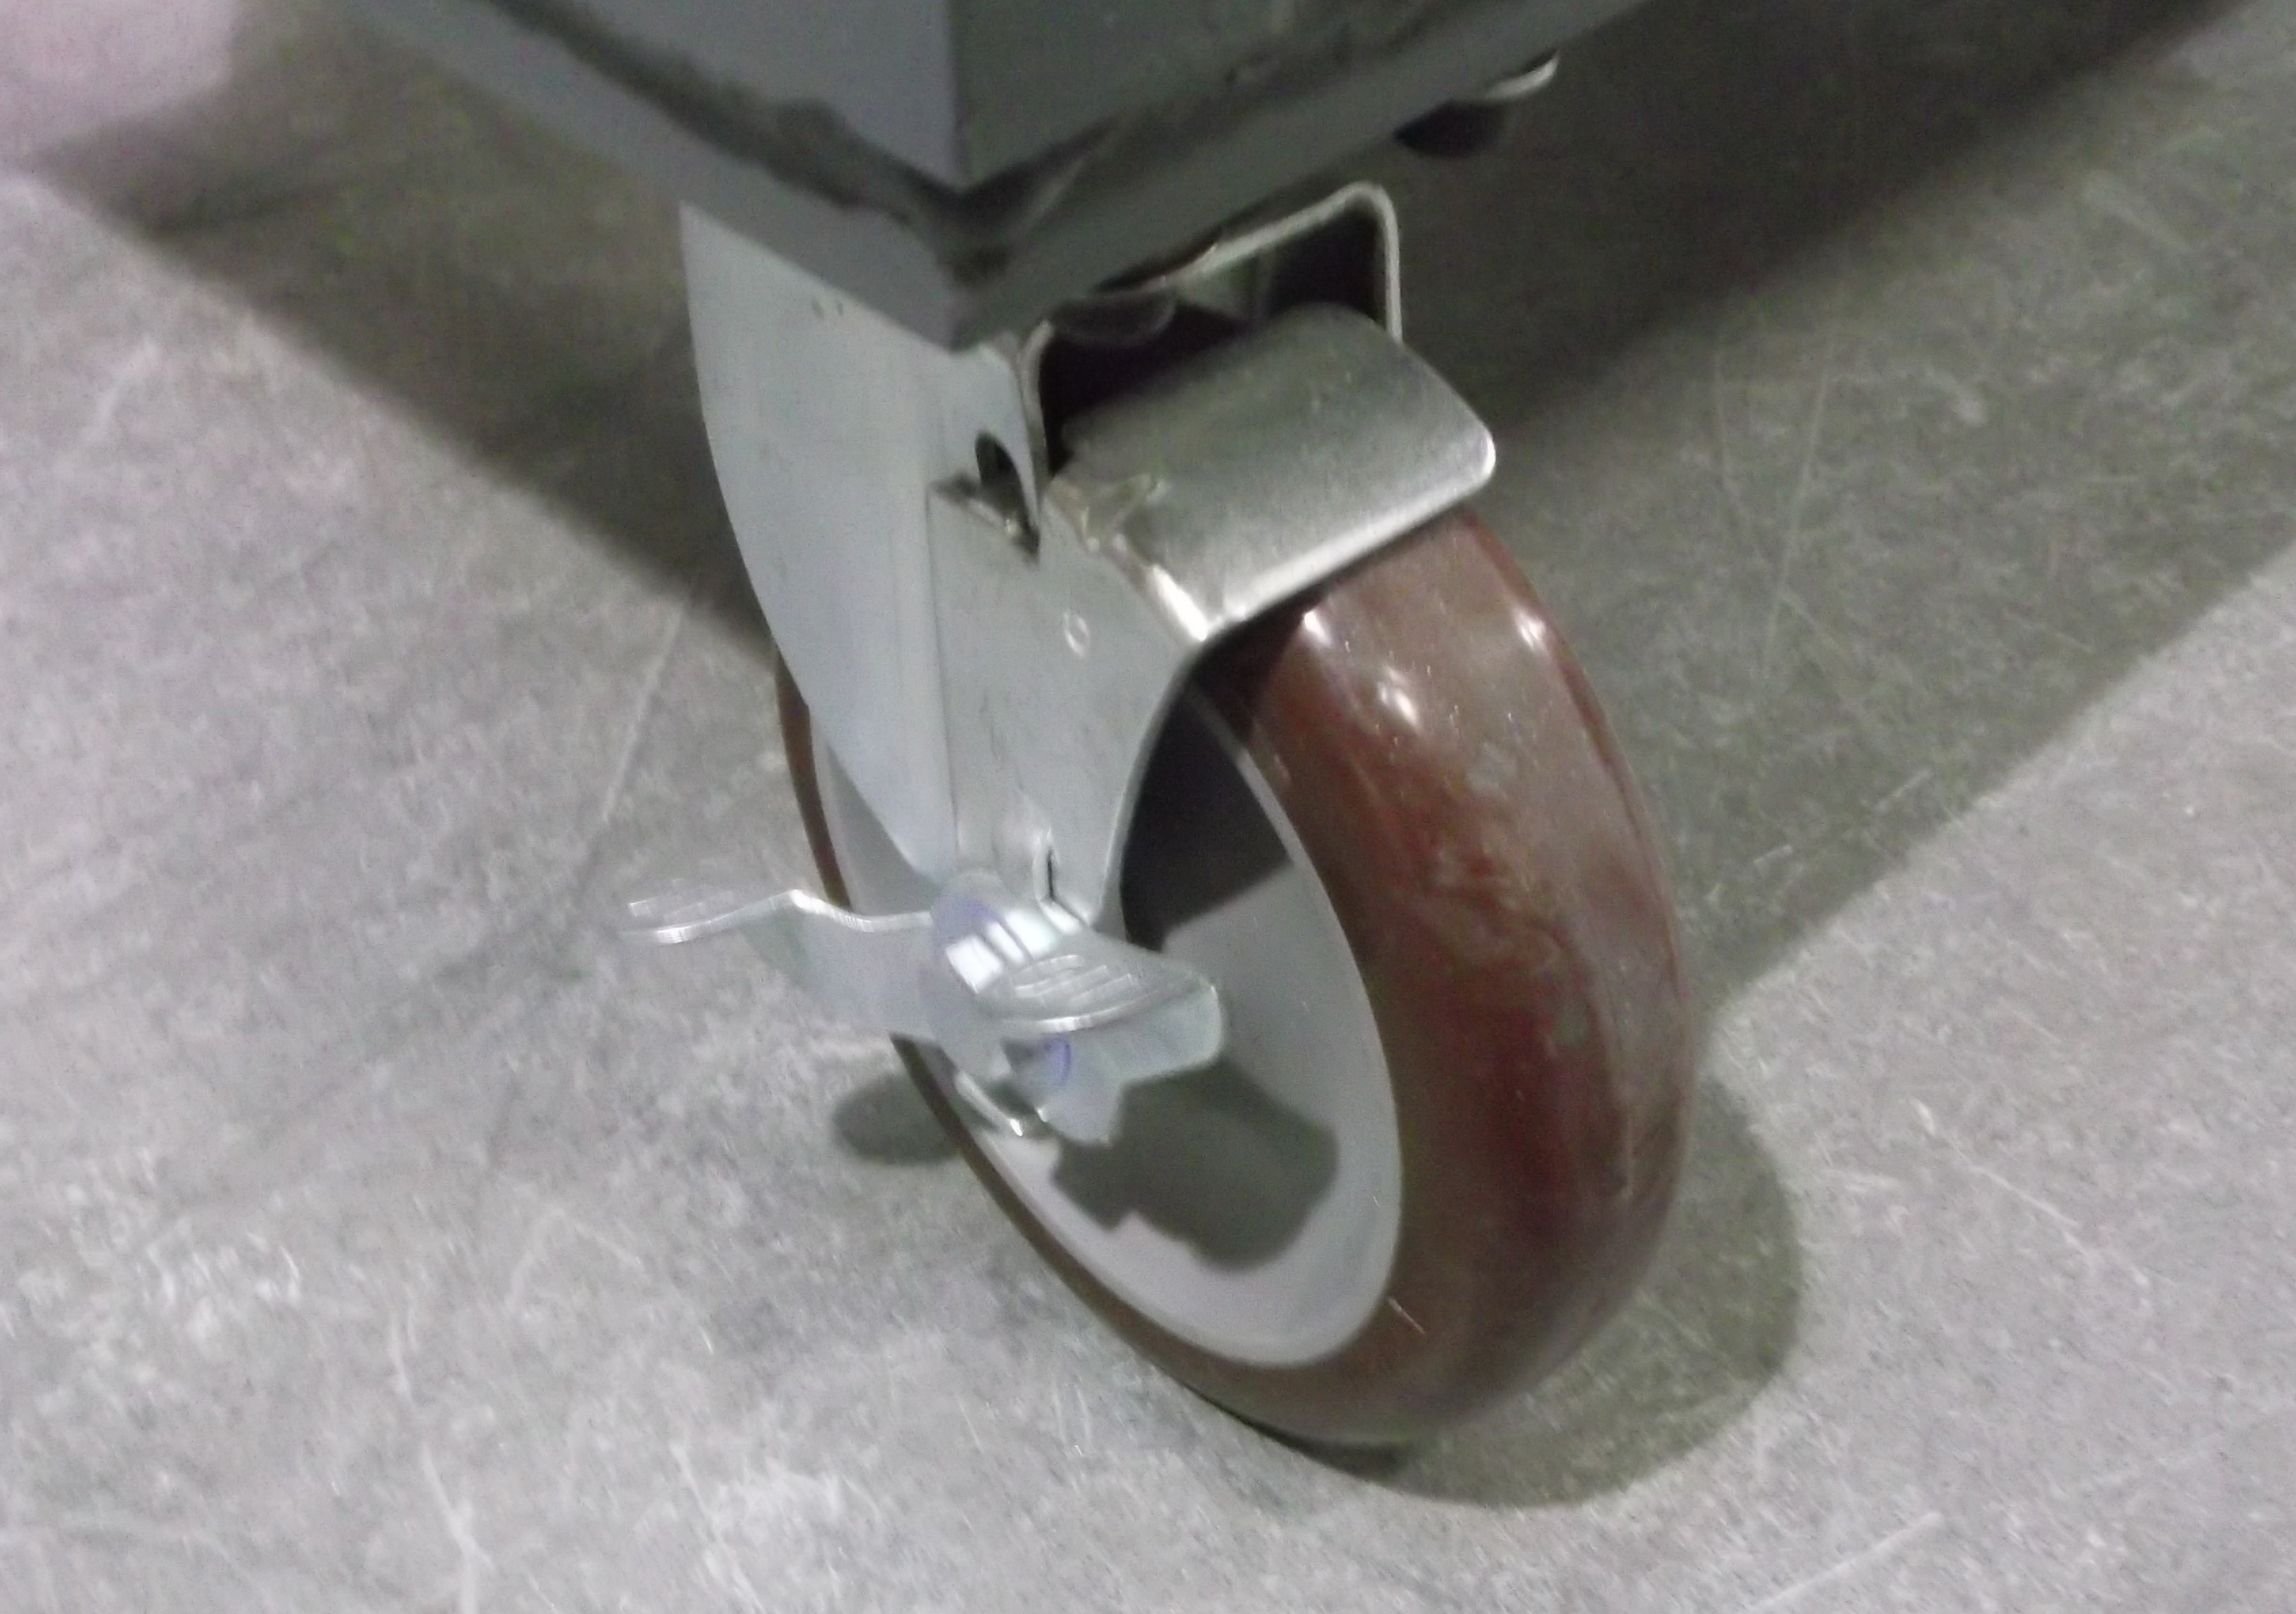
Moving the Machine. PulseSealer-294 is a very long machine. Total length of the machine is 26 feet. Please do not use a forklift or hoist to move this machine. Machine is equiped with lockable casters. Only the two front end casters are lockable. All the others are swivel type non lockable. Make sure the two lockable casters are unlocked. Only move machine using included casters.
When positioned, Lock the Casters. To do this, locate the two end casters, and press down the ON lever on the caster.
|
|
|
Connecting Electricity. Locate the Safety Switch. The Safety Switch is located left front end of the machine. For transport, the Safety Switch is locked using one or more cable ties. Remove the cable tie(s).
To open the Safety Switch, locate the red lever on the right side of the Safety Switch and move it to the lower or OFF position. Next locate the small lever on the front face lower right of the Safety Switch and gently move it upwards, while at the same time opening the Safety Switch door from right to left. Safety Switch door swivels about the left edge of the Safety Switch box.
Prior to working in this box make sure that your main power source/breaker is in the OFF position. Basically a Safety Switch serves to connect house (building) power to the machine. House power feeds into the Safety Switch from the bottom of the Safety Switch. When Safety Switch red lever is in the UP or ON position, power goes from House source into machine. When Safety Switch red lever is in the DOWN or OFF position, no power is going into the machine, however House power is still live feeding into the Safety Switch unless the House power or main power breaker is in the OFF position.
|
|
|
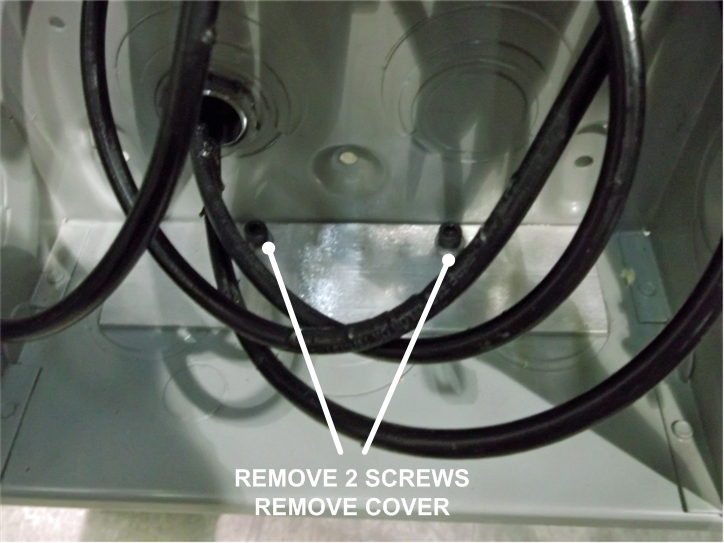
First step after opening the Safety Switch for the first time is to remove the Incoming Wire Cover Plate. Do so by removing two screws. Refer to photo inset (right).
|
|
|
With Wire Cover Plate removed, you will see a hole on the bottom left of the Safety Switch. Through this hole should be fed house power.
As shown in the photo, connect Line 1 (L1) and Line 2 (L2) to connect 220 VAC Single Phase house power line. Attach where indicated in the photo for L1 and L2.
Should Safety Switch fuses need to be replaced, replace with ECNR 100 Amp fuses. Click here or on the fuse in the photo for a close up enlarged photo of the fuse.
With connection completed, close the Safety Switch box securely, then lift the red lever to connect house power to the machine.
Turn back on House Main Power Circuit Breaker.
Note that for PulseSealing to operate, the Primary and Secondary Pulse Power Safety Switches need to be in the ON position.
|
|
|
Pulse Power Safety Switches. Located Left End, Rear of Machine. As noted in the photo (inset, right), there are two Pulse Power Safety Switches. One for Primary sealer and one for Secondary sealer. If the Safety Switch (above) is ON, and the Pulse Power Safety Switch is OFF, then the machine will operate without sealing.
Pulse Power Safety Switches were turned OFF in preparation of shipping the Machine. To turn them ON, open the Pulse Power Safety Switch, locate the fuse block, Pull the fuse block out, and rotate 180 degrees, then re-insert the fuse block such that the word OFF is in down (upside down) position.
If Power Safety Switch fuses need to be replaced, remove fuse block, turn it around and you will see the fuses. There are two fuses per fuse block. Click here for a detailed close up of these fuses. If these fuses need to be replaced, please replace with TR35RID time delay fuse.
Between the Primary and Secondary Pulse Power Safety Switches, are three fuses. Fuse 1 (F1) is a 2 Amp fuse protecting the 24 Volt Power Supply. Fuse 2 (F2) is a 5 Amp fuse protecting Line 1 of the Elevator Drive. Fuse 3 (F3) is a 5 Amp fuse protecting Line 2 of the Elevator Drive.
|
|
|
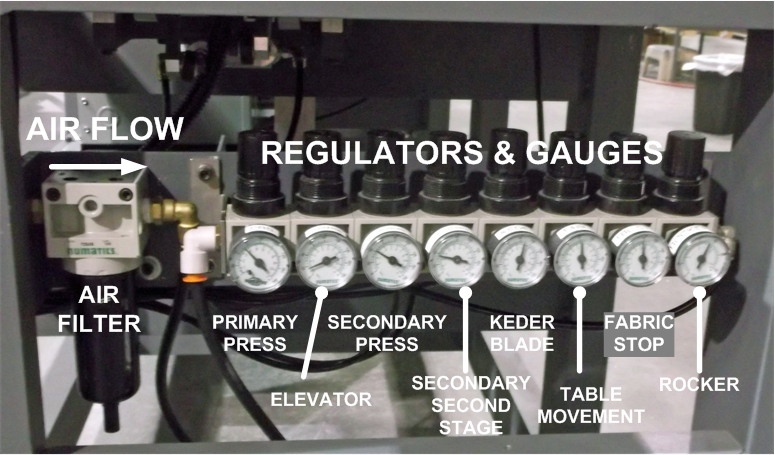
Connecting Compressed Air. Located at the Right End of the machine is the Pneumatics Center. As seen in the photo below, the Pneumatics Center consists of Air Filter and a bank of eight Regulators and Gauges. Each Regulator/Gauge is labeled to define which machine function is controlled by each Regulator.
|
|
Air flow direction is from left to right as shown by the arrow in the photo above.
Factory Default Settings for each Regulator as follows:
|
Regulator
|
Pressure Setting
|
|
Primary Press
|
53 psi
|
|
Elevator Blade
|
15 psi
|
|
Secondary Press
|
45 psi
|
|
Secondary Second Stage
|
35 psi
|
|
Keder Blade
|
88 psi
|
|
Table Movement
|
80 psi
|
|
Fabric Stop
|
76 psi
|
|
Rocker
|
40 psi
|
|
To change regulator pressure, simple select the Regulator to change, and gently pull up on the black knob above the Gauge, and turn knob clockwise to increase pressure or counterclockwise to decrease pressure. Depending on your air compressor, adjusting Regulator air pressure may be delayed in responding until compressor is fully engaged.
|
|
Cleaning the Machine. Prior to shipping the machine, all debris was removed or cleaned from the machine. The PulseSealer is a sophisticated high tech heat sealing machine and debris left on the machine can adversely affect the quality of the seal or possibly cause other non-desirable effects, including electrical shorting, etc. For smooth painted surfaces, clean surfaces with Formula 409 spray cleaner. All painted surfaces use water based environmentally safe industrial coatings. For rough or textured painted surfaces, clean the surface with compressed air making sure to avoid particles from moving into the sealing area. TOP

|
|
|
|
|
|
|
All Rights Reserved, (c) 1994-2015
|
|
|